
Firebase configuration steps
In order to configure your Firebase project, so the Copilot.cx deployment can access the data, Here are the steps to follow
💡 If you are utilizing multiple Copilot.cx projects, these steps should be done for each separately
Step 1
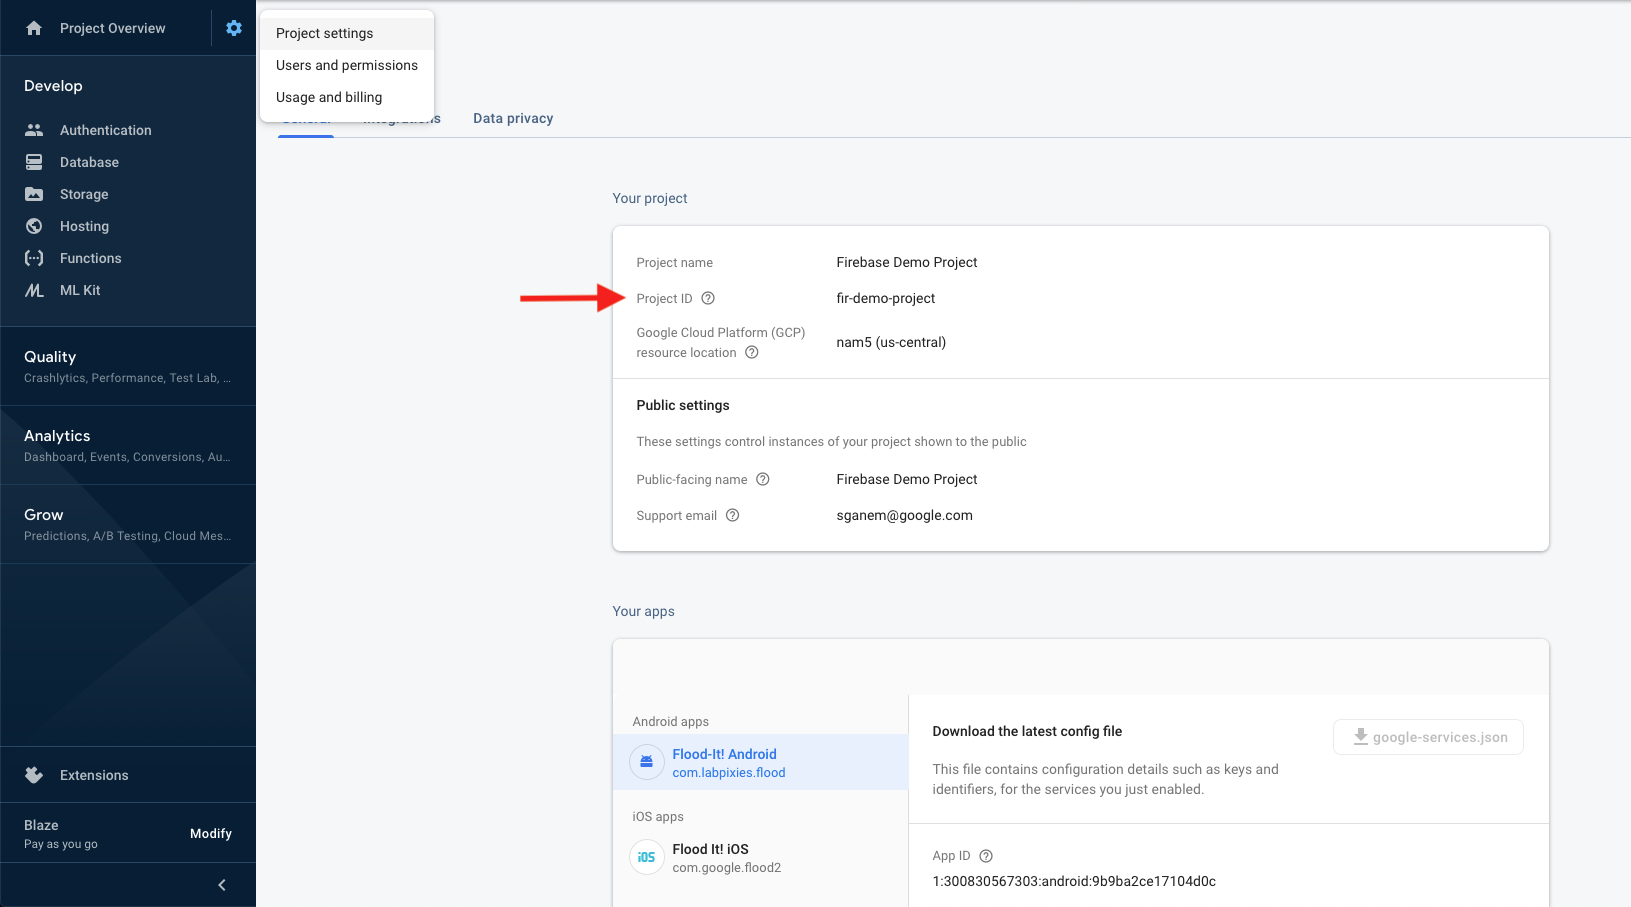
Get to settings and extract Project ID
Go to the project wanted under the Firebase console, and then access Settings - https://console.firebase.google.com
- Send us the Project ID in the main top section.
You can see the Android and iOS configurations that should have been created by your developers - If you haven’t got them, make sure your developers add the right apps for Android/iOS, you will need to turn each of them ON later.
Step 2
Adding Copilot.cx Analytics user
Go to “Users and permissions”, and add this user group with Viewer roles:

Step 3
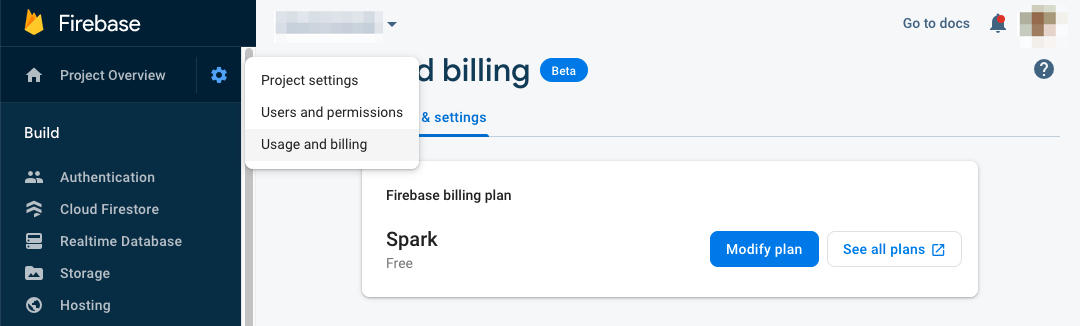
Turn on the Blaze plan if you have not yet
If this is a new Firebase project, continue to the Details & settings tab under Usage and billing, and select Modify plan to turn on the Blaze plan.
Alternitevly, you can add your CSM as an Owner of the Firbase project, and inform your Customer Success Manager so we can do it for you.
Firebase analytics with the export costs nothing at all until reaching 10GB of data (approximately 100K users data over 6 months) and then only costs 2c per GB of data, but having the Firebase on Blaze plan will allow the data to be saved indefinitely, even though it will not cost anything currently.
Step 4
Get to Big query setup
Continue to the integrations tab in the General Settings, and enter the BigQuery setup details.
‼️ You may need to enable Google Analytics if they have not been auto-enabled yet (See left of image below).

Step 5
enabling big query
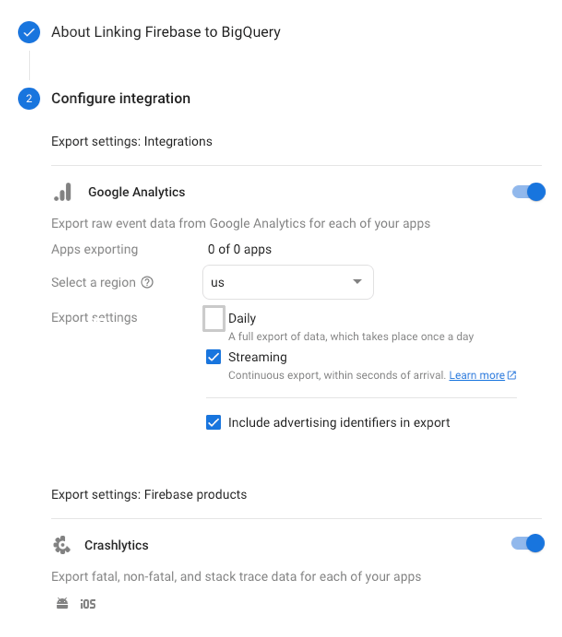
Approve and enable BigQuery through the Wizard, if you have not yet connected BigQuery to your project.
During the Linking process, or at any time after, validate the following has been done:
- Toggle both apps ( And web apps if needed ) ON.
- Select the region "US" - which is the multi-region for North America.
- Check the "Streaming" checkmark, without checking the "Daily" checkmark.
- Check “Include advertising identifiers in export” checkmark.
- Under “Crashlytics”, also toggle both apps ON.
If you add more apps, you should turn the analytics & Crashlytics ON for each of them ( Including Streaming if needed)
Step 6
Google cloud platform IAMs
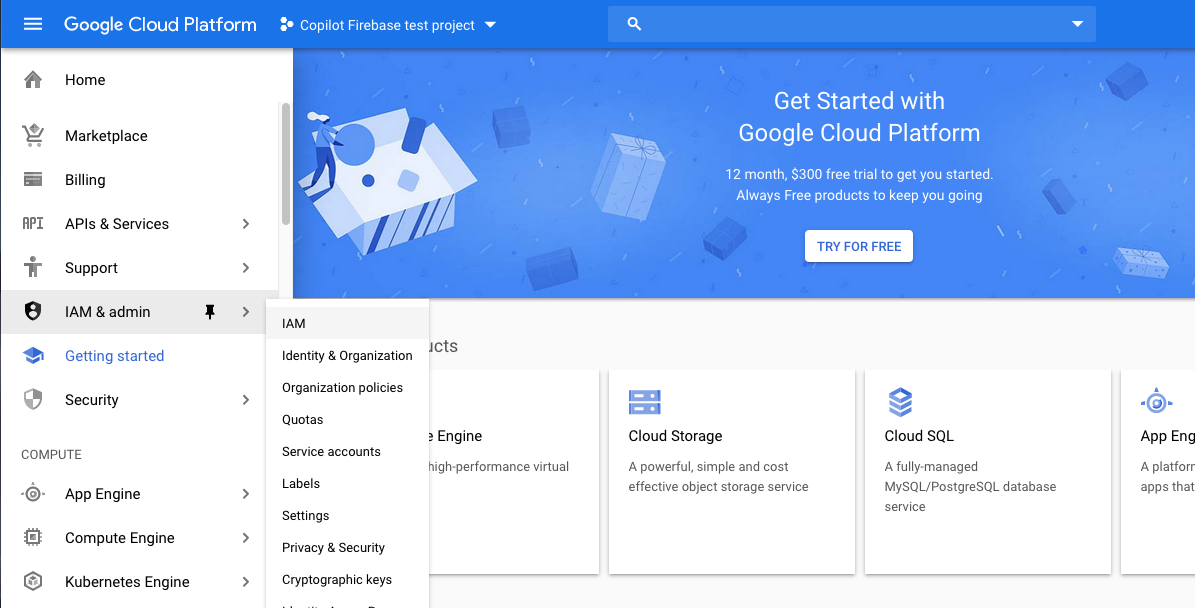
Go to to the Google cloud platform console and select your project at the top.
If you have inegrated BigQuery beforehand, you can press View in BigQuery to go directly to the GCP for the BigQuery integration
Then go to IAM & Admin.
Step 7
Add Copilot.cx Growth user
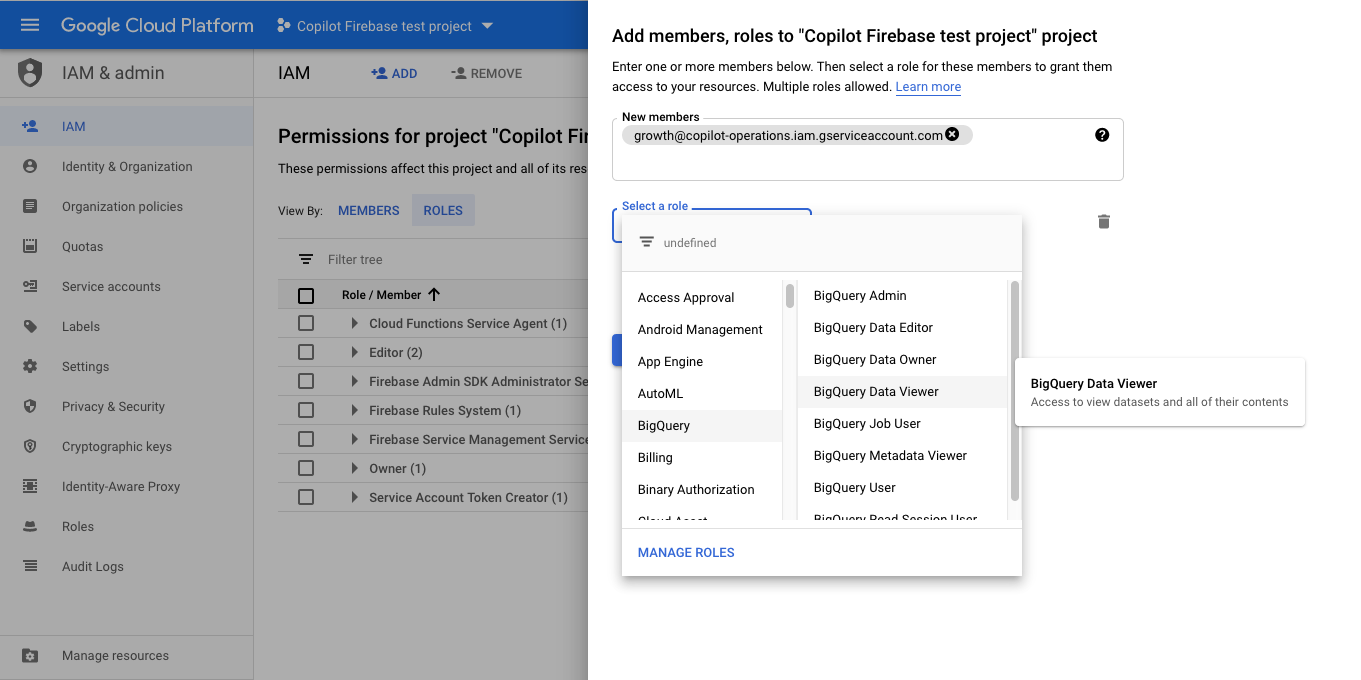
In the top of the Members and Roles, press the ADD button.
Add the member growth@copilot-operations.iam.gserviceaccount.com
The set three roles by selecting a role, and “Add another role” and Save
- BigQuery DataViewer.
- BigQuery Job User.
- BigQuery User.
You're all done
If you're running into trouble, please contact your Customer Success Manager with any questions.